
I’ll walk you through how to find or add your business in ChatGPT, verify it, and set up the profile customers can open from an answer. I’ll use Phrase It’s Business Hub to show you where the settings are, how to choose a category, and what to check if ChatGPT can’t find your DNS record.
What Is ChatGPT Business Hub?
ChatGPT Business Hub is where owners and authorized representatives claim and manage a business profile. Once verified, you can update your business details and see how often ChatGPT references your business or sends people to your website. Retailers can connect a product feed, and eligible businesses can publish a Business Agent.
OpenAI launched Businesses in ChatGPT in beta on November 10, 2026. When your business appears in a ChatGPT answer, people can open its profile for more information. The Business Agent, where available, adds a separate conversation in which customers can ask about your products, services, or policies.
How to Claim Your Business in ChatGPT
Sign in to Business Hub with the ChatGPT account that should manage your listing. Search for your business, select the correct result or use the create option if it’s offered, and follow the verification prompts. After OpenAI approves your claim, complete Persona verification to manage and publish changes to the profile.
Step 1. Open Business Hub and Find Your Business
Open Business Hub and select Add. Search for your business by name. If several results look similar, compare the website and location before picking one, especially if the business has several branches or shares a name with another company. Confirm the account you want to use to manage the profile.
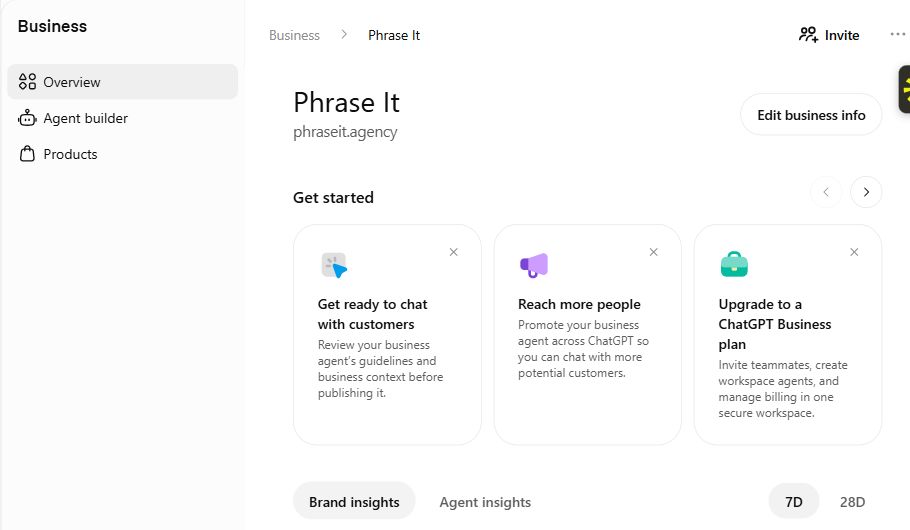
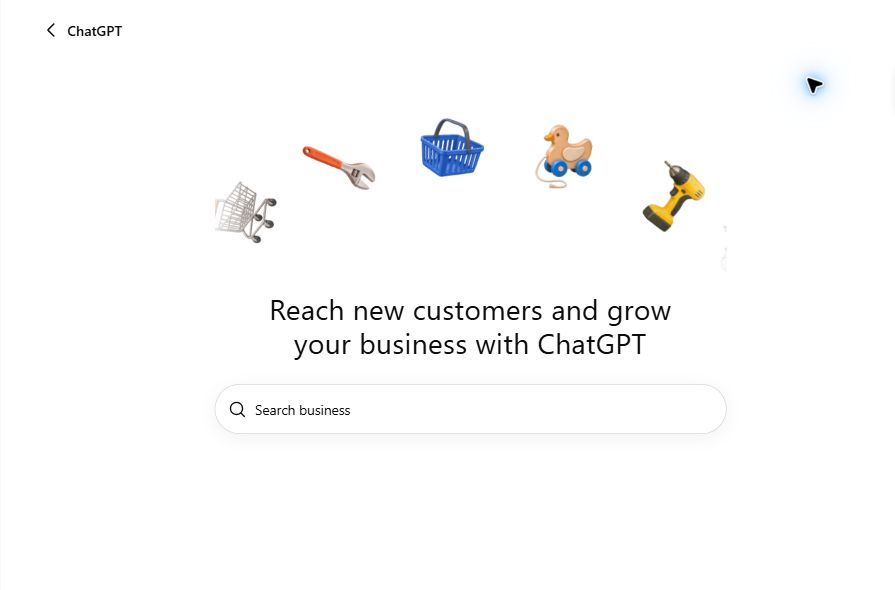
Select Add in Business Hub to open the business search.
If you’re working from an invitation, open the link in the original email and sign in with the address that received it. If your company manages multiple brands, check the profile for the specific brand you’re setting up. Claiming the parent brand doesn’t claim its individual locations.
Step 2. Use the Create Option if Your Business Is Missing
If the search returns no match, look for Create ‘[business name]’. Eligible online businesses may be able to add a profile from there. Before you start, double-check the name and spelling and check your Business Hub list for an existing profile. I already had Phrase It in the Hub when I captured the example below.
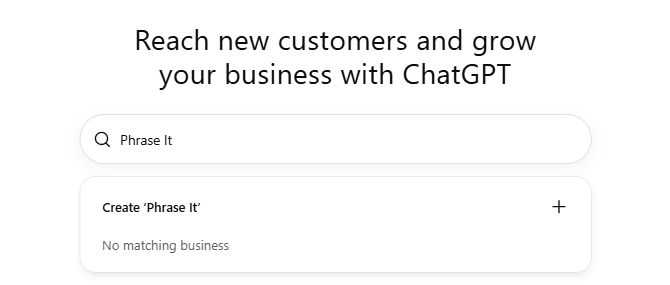
The Create option can appear when Business Hub finds no matching listing.
OpenAI currently lets local stores and restaurants claim existing U.S. listings. If a listing is locked, use Contact support. If it has already been claimed and you’re authorized to manage it, open the listing’s three-dot menu and look for Dispute ownership.
Step 3. Choose a Claim Verification Method
Business Hub displays the methods available for your listing. Choose one you can complete with access you already have.
| Method | What You Do |
|---|---|
| Business phone | Choose a text or automated call, then enter the code sent to the number shown. If the number goes through a switchboard, make sure someone can receive the call. |
| Business email | Request a code and retrieve it from the business inbox. If it doesn’t arrive, check spam and confirm someone has access to that inbox. |
| Website domain | Add the TXT record Business Hub gives you at the provider serving the domain’s DNS. Use the next step to check your record. |
| Shopify store | Choose Connect Shopify, review the permissions, and sign in to the store for the business you’re claiming. |
Follow the remaining prompts and check your email for OpenAI’s decision or a request for more information. If your claim is pending, keep the original claim open while it’s being reviewed.
Step 4. Add and Check the DNS TXT Record
If you chose Website domain, ChatGPT will display the record you need to add. A TXT record is a piece of text your DNS provider publishes for a specific hostname. OpenAI looks up that hostname and checks whether it returns the value shown in your claim.
- Open the DNS dashboard for your domain. This could be your registrar, your web host, or a service such as Cloudflare. If you’re unsure, look up the domain’s nameservers. They show which service answers DNS queries for the domain. If someone else manages the zone, send them the record details from Business Hub.
- Add a new record and choose TXT. In Cloudflare, open the domain, go to DNS → Records, then select Add record. Paste ChatGPT’s Name into the provider’s Name or Host field and the Value into its Content or Value field.
- Check the full hostname before saving. Some providers append your domain to what you enter. If ChatGPT gives you a full hostname and your provider expects only the part before your domain, enter that part. Use
@only if ChatGPT requires a record at the root domain and your provider uses@for the root. Leave your existing email and website records in place. - Save, then check the record from outside the dashboard. Use the full hostname from ChatGPT. Compare the TXT answer with the value in your current claim. Then return to Business Hub, select Verify domain, and follow the remaining prompts.
I’d check the TXT record before retrying the button. On macOS or Linux, use dig. On Windows, use PowerShell. Replace verification.example.com with the full hostname from your screen.
dig @1.1.1.1 verification.example.com TXT +short
Resolve-DnsName -Name verification.example.com -Type TXT -Server 1.1.1.1
If the result is empty, use dig example.com NS +short or Resolve-DnsName example.com -Type NS to find your domain’s nameservers. Query one of those servers directly by replacing 1.1.1.1 in the TXT command with its hostname. That checks the server responsible for the record and bypasses the public resolver’s cache. Google Public DNS troubleshooting · Cloudflare DNS troubleshooting
| What You See | What to Check |
|---|---|
| The DNS dashboard shows the record, but the authoritative server returns nothing | Confirm you edited the live DNS zone and used the full hostname from ChatGPT for the lookup. |
| The saved hostname repeats your domain | The provider may have appended the domain to a full hostname. Edit the Name field using the provider’s required format. |
| The lookup returns a different TXT value | Compare it with the active challenge. Check for missing characters, extra spaces, or an older token. Other TXT records can coexist, so look for the one matching the challenge. |
| The authoritative server shows the record but the public resolver returns nothing | The public resolver may still have an empty answer cached. Check another resolver and retry once the record is visible. |
| The expected value is visible but Business Hub still shows an error | Confirm you’re on the same claim and domain. Check the current record on the verification screen, then retry. If it persists, send Support the step and error with a redacted screenshot. |
If the domain verifies but your website still shows an access issue, check how your redirects, crawl rules, and pages respond. We can help you find the issue and give your developer a fix they can test.
Explore Technical SEO SupportStep 5. Complete Persona Verification
In Business, open your profile. On its overview, find Complete verification with Persona, select Verify, and follow the prompts into Persona. Have your government-issued ID, business registration details, and proof that you can act for the business ready in case they’re requested.
If your public brand differs from the registered company name, enter the legal details as they appear in your records wherever Persona asks for them. Check your email for approval or a request for more information. If the check expires or fails and Business Hub offers Try again, follow the email instructions and correct any mismatched information before resubmitting.
Persona approval gives the profile its blue check and enables profile updates and insights. If you use Persona to create a new profile, approval automatically publishes that profile.
How to Set Up Your ChatGPT Business Profile
Open your business overview and select Edit business info. Start with the category, description, website, and contact details. Add your logo and cover photo, then review the profile preview and save your changes. If you sell products, check your delivery and returns details before connecting a feed.
Step 6. Pick Your Business Category
Go to Overview → Edit business info → About → Business category. Search for the label that best describes what you sell. Put your specialties and the people you serve in the description. I’d use these labels for the three business types below. Each appeared in the live picker.
| If You Run a… | Category to Look For | What to Include in the Description |
|---|---|---|
| Marketing or SEO agency | Marketing agency | List your main services, the types of companies you work with, and what clients can hire you to do. Phrase It uses this category and describes its SEO, content, and AI search work in the description. |
| SaaS or software business | Software company | Name the product, who uses it, and the task it helps them do. Give buyers a clear sense of the use case, such as preparing real estate proposals or managing customer onboarding. |
| Real estate brokerage | Real estate agency | Name the markets you serve and whether you work with buyers, sellers, or renters. The picker also offers Commercial real estate agency for commercial firms and Real estate agent for individual practitioners. |
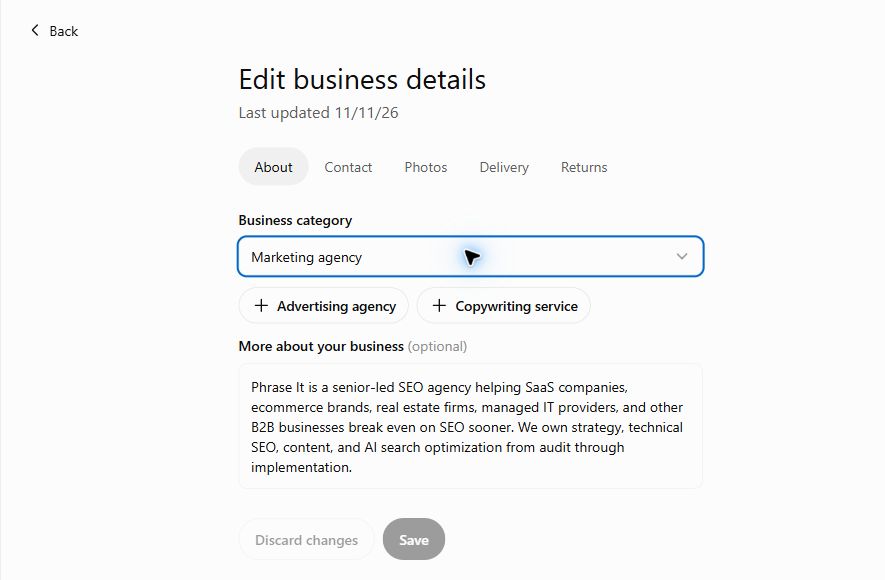
Phrase It uses Marketing agency as its category and lists its specialties in the description.
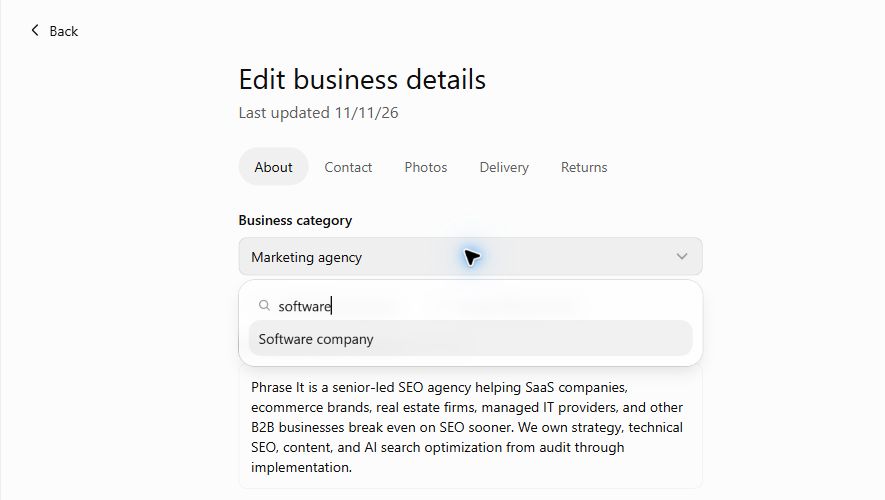
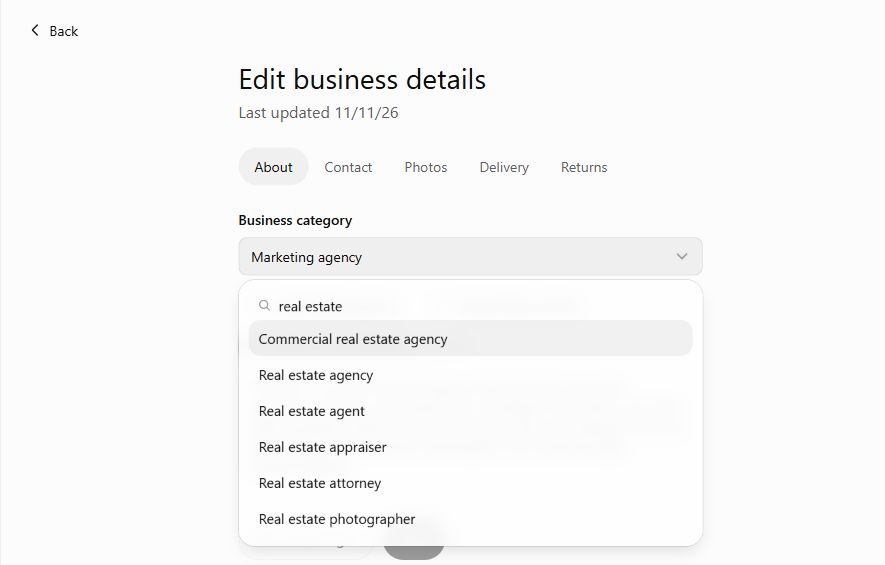
The live picker offers separate labels for software companies, brokerages, and individual agents.
Step 7. Add Your Website, Contact Details, and Photos
In About, write a short description that tells a customer what you offer and who it’s for. In Contact, check the website URL and public contact information. If your company has a separate booking or support page, use the profile fields for their stated purpose and keep customer-facing details consistent with your site.
In Photos, add your logo and, if useful, a cover image. The editor recommends a 300 × 300 px logo and a 1200 × 400 px cover. Review Delivery and Returns where they apply, then use Profile preview to see the profile together. Save your changes. OpenAI reviews updates, so they can take time to appear.
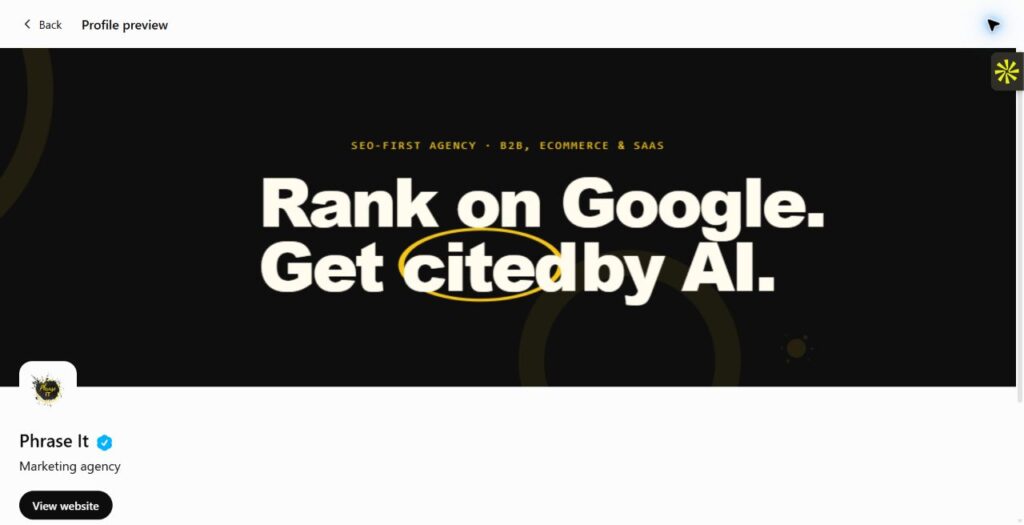
The Phrase It profile preview shows how the category, logo, cover, and website link appear together.
If someone else will maintain the profile, use Invite in Business Hub. Give teammates or agency staff access through their own ChatGPT accounts. An invitation may require workspace membership if the profile was claimed in a workspace.
We test the questions your buyers ask and review the sources ChatGPT uses to answer them. You’ll see where your website appears and which pages or sources deserve a closer look.
Explore Phrase It’s GEO AuditHow to Use Products, Business Agents, and Insights
After verification, use Products if you have a retail catalog to share and Agent builder if your business qualifies for a customer-facing agent. Then open Overview to see how ChatGPT already references your business. For a service company, a complete profile and a baseline for mentions and clicks are a practical starting point.
Step 8. Connect a Product Feed if You Sell Products
Open Products to see the options for your business. If you use Shopify, connect the relevant store so ChatGPT can receive product details, pricing, and availability through Shopify’s catalog. Other retailers can provide a CSV that follows OpenAI’s product feed specification. If you use a hosted URL, point it directly to the feed file.
Check a few products against your live site before relying on the feed. I’d start with an in-stock item, a product with variants, and an unavailable item to make sure each one’s details match what customers see on your store.
Step 9. Preview and Publish a Business Agent if You’re Eligible
At launch, agents are available to eligible U.S. ecommerce and online service businesses. Open Agent builder, review your business information and policies, and write instructions for how the agent should answer. Add links to pages customers can use to take the next step.
In preview, try a question you answer every week, a question that calls for a link, and a question the agent should hand off. A marketing agency could test a question about which services it offers. A software company could test which features come with a particular plan. For a real estate business, keep any agent use to general information within its approved role and send questions requiring licensed advice to a qualified person.
Review the answers and select Publish when you’re ready for customers to use the agent. OpenAI considers the business category and intended use when evaluating agent eligibility. Business Agents policy
Step 10. Check Brand Insights and Website Access
Open Overview → Brand insights. On Phrase It’s dashboard, I could switch between 7D and 28D, and I could see a separate Website access status for the saved URL. If you’re checking the dashboard after a site change, start by confirming that URL is the one you want customers to visit.
Phrase It’s Business Hub overview, with the 7D and 28D controls visible.
- Mentions count references to an online business’s website. For a local business, a mention counts when ChatGPT shows that location as a result.
- Website clicks show how often people clicked through to your site. I’d pair this with referral and conversion tracking on the site to see what those visitors do after they arrive.
- Discovery topics show aggregate themes from answers that cited or mentioned your business. Use them to see what types of questions tend to surface your business. A blank metric can reflect a reporting threshold, ongoing collection, or unavailable data.
Frequently Asked Questions About Claiming a Business in ChatGPT
Business Hub handles the listing, the verification status, and the information you share about your business. If you’re deciding whether to claim a profile or working out why yours is stuck, start with the requirements for the claim, the Persona approval status, and the exact option shown in your dashboard.
Do I Need to Advertise or Publish an Agent to Claim My Business?
You can claim an eligible business through Business Hub without an ads account, an Enterprise agreement, or a published Business Agent. After claim and Persona approval, you can manage your business details and see available insights.
What Does Business Verification Do?
Claim verification checks your connection to the business through a method such as its phone, email, domain, or Shopify store. Persona checks your identity and may ask for proof that you can represent the business. Once Persona is approved, you can publish profile updates and see available insights.
Why Is My ChatGPT Business Profile Still a Draft After DNS Verification?
Check the business overview for an unfinished claim or a pending Persona check. If OpenAI requests more information, follow the instructions in its email. For a new profile created through Persona, OpenAI publishes it automatically when it approves verification.
Will Claiming My Business Make ChatGPT Recommend It More Often?
Claiming gives you a way to supply and update business information in ChatGPT. ChatGPT makes its recommendations independently, and OpenAI gives no guarantee that claiming a profile increases placement or sales.
Once your profile is verified, open the preview and check it as if you were a customer. Look at the category, website, and description, then record your first Insights baseline. If you want to understand where you already appear for the questions buyers ask in ChatGPT, compare those metrics with the answers and sources you see for your own market.
Bring your website and a few questions you hear from customers. I’ll look at your search visibility with you and tell you where I’d focus first.
Book a Strategy Call